Recipe | Light Seeded Brioche Buns
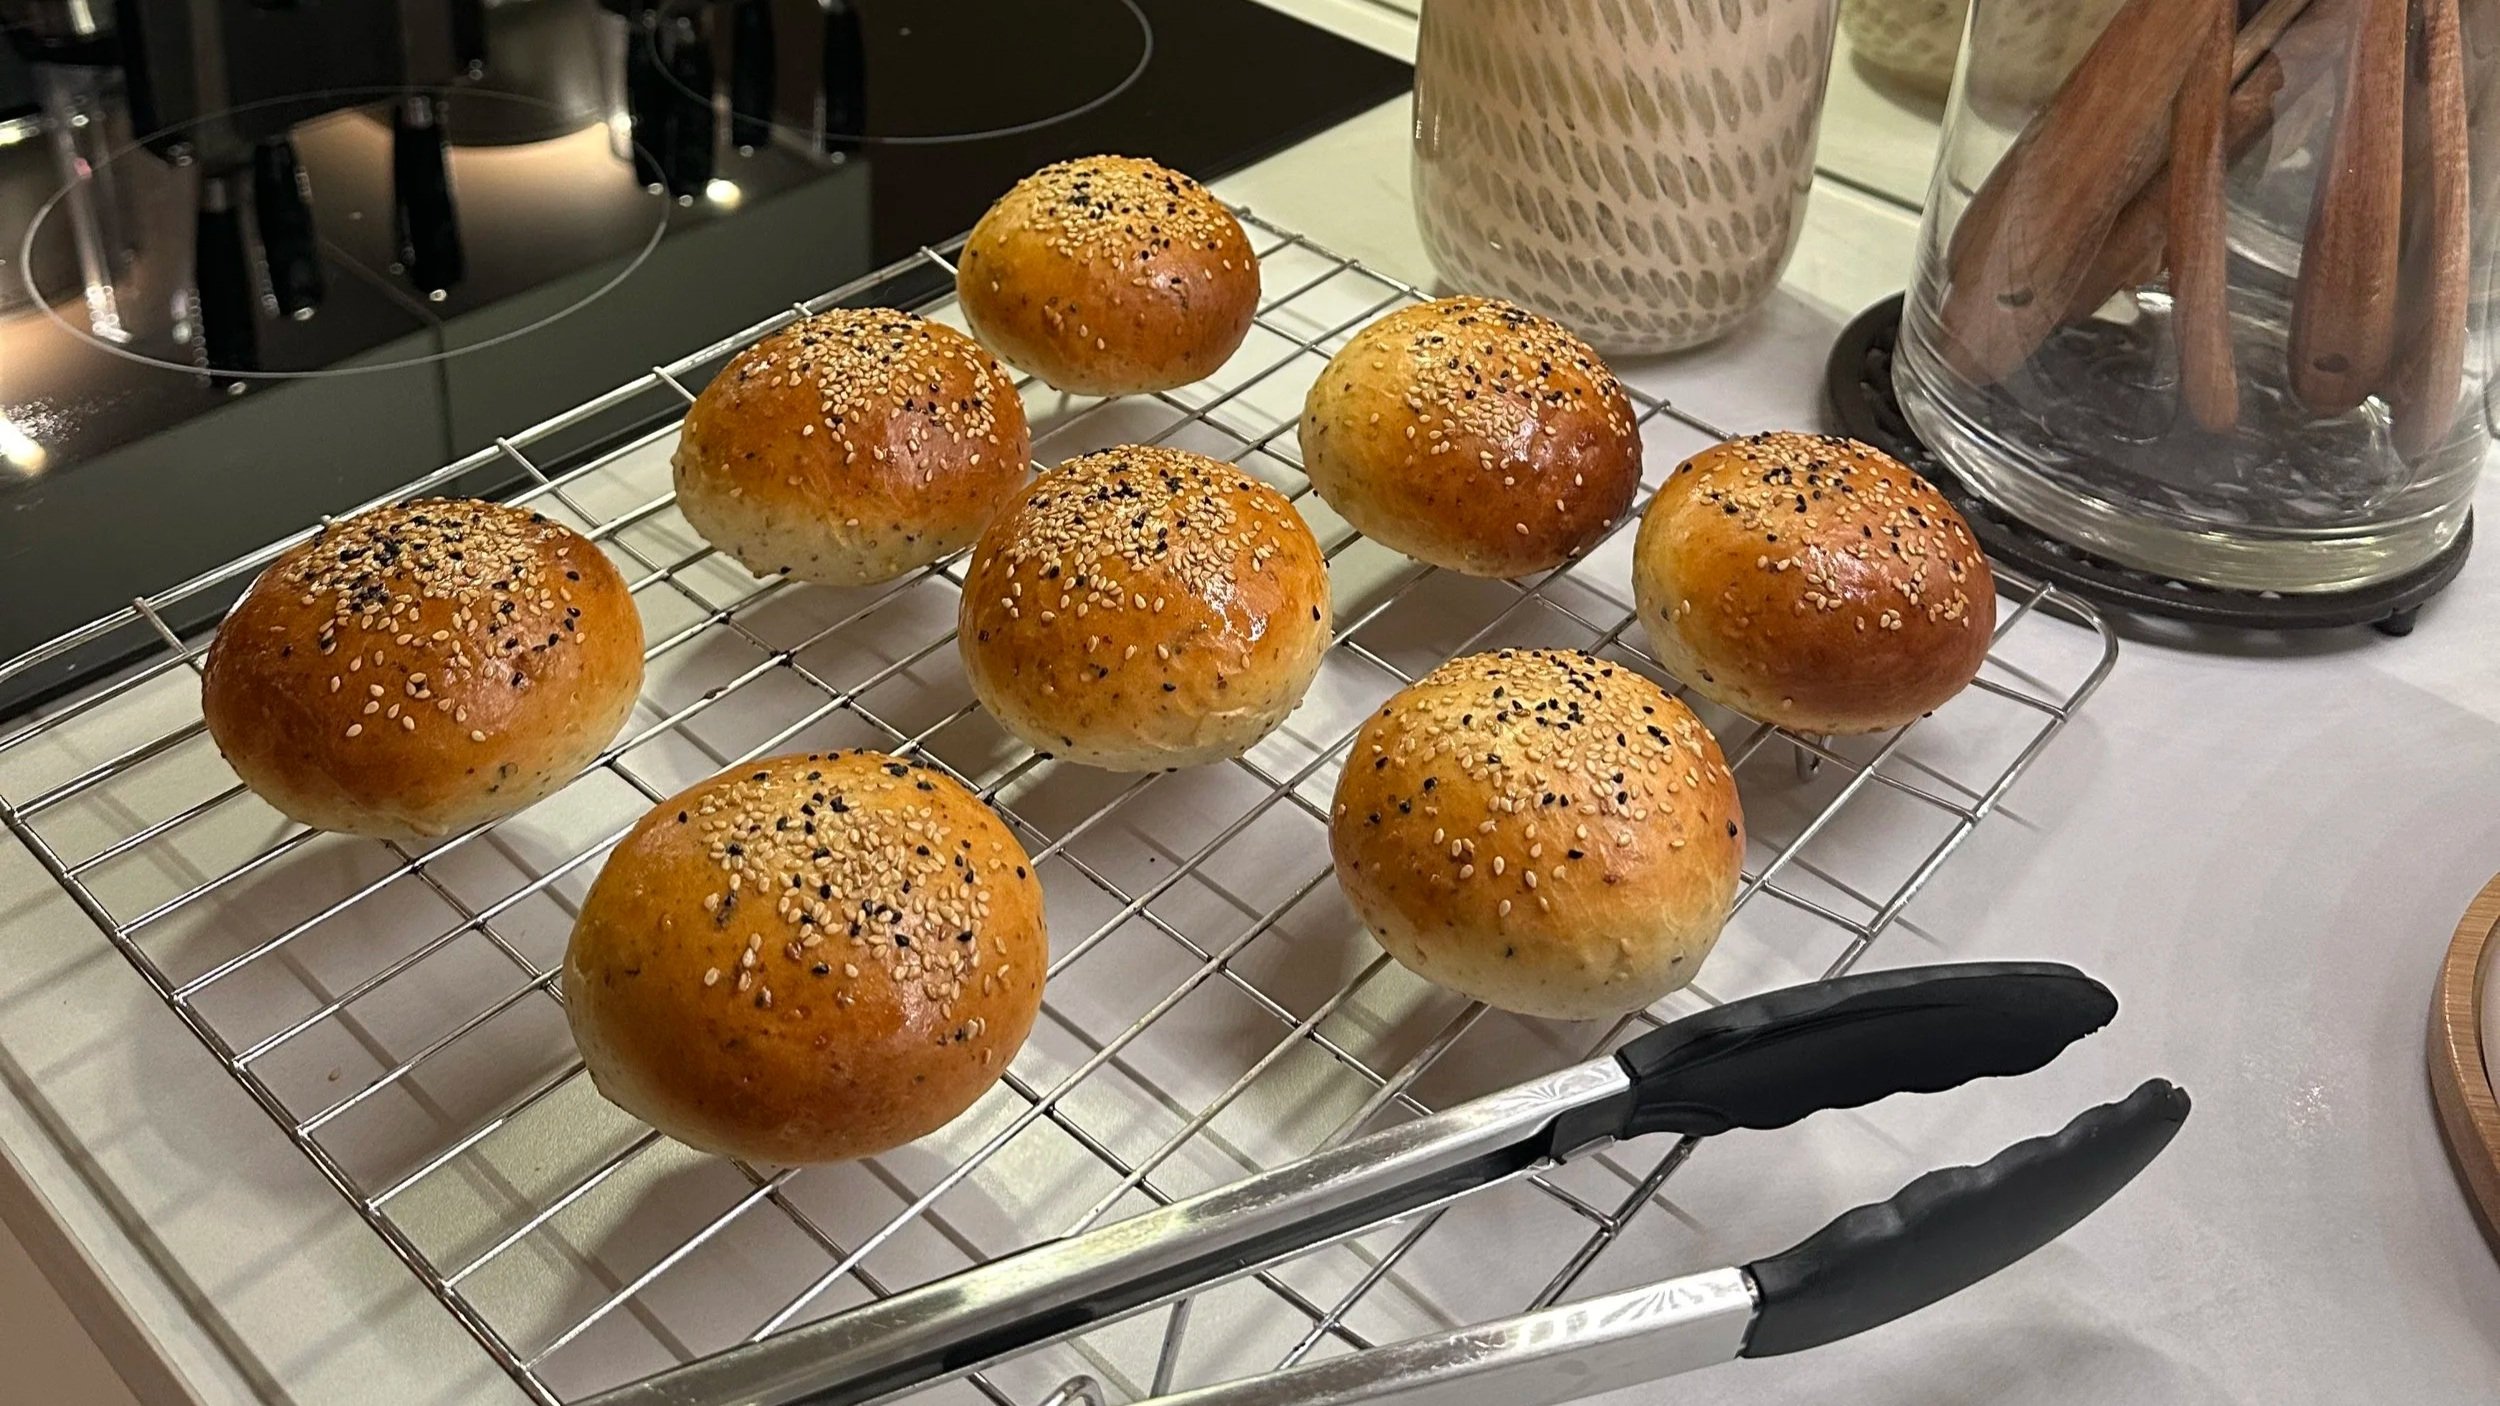
Golden brioche buns straight out of the oven on cool wire rack, topped with sesame & nigella / kilonji seeds.
RECIPE | kitchenaid method | produces 4 large / 5 medium / 8 small buns | soft, fluffy, lighter-than-classic brioche
Ingredients:
Dough:
250g strong white bread flour
5g fast-action yeast (1.5 tsp)
20g golden caster sugar
5g fine salt (1 tsp)
1 tbsp ground flaxseed
1 medium egg, room temperature
120ml warm semi-skimmed milk (neutral-warm like bathwater, not hot --> kills yeast)
30g unsalted soft butter (or 25g neutral oil for lighter version) - not melted, soft can press finger into
1 tbsp olive oil (optional but recommended)
Seeds inside dough:
1 tbsp sesame seeds
1 tbsp sunflower seeds
1 tsp nigella or pumpkin seeds (optional)
Topping:
1 egg + 1 tbsp milk (egg wash)
Mixed seeds for sprinkling
Equipment:
Kitchenaid mixer
Dough hook attachment
Stainless steel bowl preferred.
Method:
1. Mix dry ingredients:
Add to the KitchenAid bowl:
250g strong white bread flour
5g fast action yeast
20g golden caster sugar
5g fine salt
1 tbsp ground flaxseed
1 tbsp sesame seeds
1 tbsp sunflower seeds
1 tsp nigella seeds (or pumpkin seeds, optional)
Attach the dough hook and mix on Speed 1 for the KitchenAid for 30 secs to evenly distribute (or by hand with a spoon).
2. Add wet ingredients:
Pour into the bowl:
1 medium egg
120ml warm semi-skimmed milk
30g soft butter
1 tbsp olive oil (optional)
Mix for 1 minute until rough, shaggy dough forms. Scrape the bowl once if needed. The dough will look uneven at this stage - this is correct.
Tip: add fats gradually after 3-4 kneading (butter + olive oil). Gluten forms best when flour hydrates without fat coating it --> dough becomes stronger and less sticky.
Tip: After mixing the dough, let it rest for 5 mins before judging it. Flour absorbs liquid, gluten relaxes, dough becomes easier to handle. Many bakers do this automatically.
3. Knead:
Increase mixer to Speed 2 only (IMPORTANT: higher speeds for dough can damage motor).
Knead for 7-9 minutes total.
You'll observe stages:
Mins 1-2: sticky and rough
Mins 3-5: dough begins pulling from bowl sides
Mins 6-8: smooth and elastic <-- should transform here
End: dough lightly wraps around hook and gently taps bowl.
The dough should feel:
Soft
Elastic
Slightly tacky but not wet.
Should look smoothier, shinier, slap bowl gently, wraps partly around hook, dough cleaning sides of bowls intermittently.
Sticky dough = soft buns. Dry dough = dense buns
Sticky dough often produces better bread than dry dough
Soft skin, not playdough consistency. Comes off fingers slowly, not dry / stiff, slightly tacky, soft like a pillow.
NB:
If still very sticky after 5 mins, add 1 tsp flour at a time only if necessary.
Only add more flour if pouring like batter, completely unstructured, cannot gather at all.
Supposed to feel sticky while kneading --> the gluten develops more slowly because this is enriched dough.
Windowpane test: stop mixer and stretch a small piece of dough. It should stretch thin enough to let light through without tearing quickly. If it tears easily, knead 1-2 minutes more on Speed 2.
4. First rise:
Shape dough into a loose ball and place back in the bowl using lightly oiled hands. Cover and leave to rise for 60-75 mins, until roughly doubled.
Ideal environment:
Warm room temperature
Away from droughts
Oven (off) with light on and door closed.
5. Divide & shape:
Turn dough onto the counter (minimal flour).
Gently press; not aggressive punching. Think exhale, not destroy.
Divide into 4 pieces for large brioche burger-style buns, or 5 for medium, 8 for small.
Shape each piece by pulling edges underneath repeatedly, then rolling against the counter to create surface tension.
NB: Try not to add flour unless sticking badly.
Place buns onto a parchment-lined baking tray with space between them.
Gently press each ball with fingers once so it becomes a small thick disc (for wider burger-style buns).
6. Second rise:
Cover loosely and allow to rise for 35-45 mins.
They should look puffy, slightly jiggly, around 1/2 orignal size (not doubled).
7. Egg wash & seeds:
Whisk together 1 egg + 1 tbsp milk.
Brush gently over each bun. Soft strokes, lightly press brush once in one direction.
Tip: wait 5 mins after first brush, and lightly brush again.
Sprinkle mixed seeds generously on top and press in lightly with fingers.
8. Bake:
Preheat oven to 190c. Turn on 20 mins before so properly pre-heated = best oven spring.
Bake buns for 15-18 mins until deep golden brown. For more even browning, turn tray 180 degrees around 8-9 mins.
Bottoms should sound hollow when tapped.
9. cool:
Wait 2 mins, and then transfer buns to a wire rack and cool for at least 20 mins before slicing --> allows internal steam to finish setting the crumb for maximum softness.
Rub lightly with butter (not melted) when warm out of the oven for extra bakery softness.
After 10 mins cover with a dry tea towel to ensure softness.
Expected result:
Light, fluffy interior
Soft brioche feel without heaviness
Thin, golden crust
Strong enough for burgers without collapsing
Keeps well and freezes beautifully.
Nutrition info:
This is real bread made with real ingredients.
200kcal per bun (max)
Flaxseed --> fibre + omega 3. Helps maintain softness when fat is reduced. Holds moisture in the crumb.
Sesame & sunflower seeds --> minerals + healthy fats
Semi-skimmed milk --> protein + calcium
Olive oil instead of only butter
No preservatives or emulsifiers
2 small tweaks to recipe to bring calories down to 160kcal each while still staying soft:
Use 15g butter instead
Reduce flour to 230g --> can safely reduce this slightly because enriched dough holds moisture well
Increase milk from 120ml to 140ml --> keeps hydration and softness.
Reduce sugar from 20g to 15g (would barely notice).
Egg contributes structure, softness, colour, flavour. Without it, buns become more like standard bread rolls.